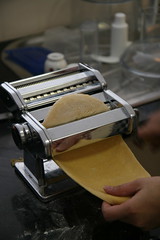
Note: A pasta roller, such as the one below, makes rolling out and cutting the pasta much easier.

A hand-cranked pasta roller similar to the one we have; Creative Commons image by Allerina & Glen MacLarty
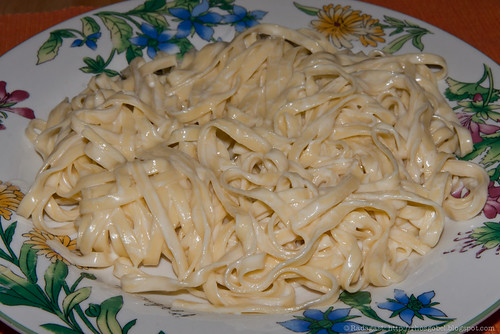
Update January 2011: The fresh pasta made with this recipe can be used with many different sauces; our most frequent pairing over the past few years has been to serve it with our alfredo sauce. A half recipe of each makes enough for a filling meal for the two of us.

Fettuccine alfredo made with fresh pasta; sauce recipe is here.
Fresh pasta (makes ~1 pound of pasta):
2 1/4 - 3 cups flour (all-purpose flour is fine)
4 large eggs
salt for the cooking water (about 1 tablespoon of salt per gallon of water)
Garlic butter sauce (enough for ~1 pound of pasta):
12 tablespoons butter
2 medium cloves garlic, peeled and finely minced or pressed with a garlic press
Grated pecorino romano cheese, for serving (at least 1/2 cup, though vary to your tastes)
Making the pasta:
0. You'll need plenty of flat, towel-covered table or counter space to hold the pasta after it's been rolled out.
1. Put 2 1/4 cups of flour and the eggs into a food processor and process until the dough begins to come together (about a minute; it's probably best to do this in a number of long pulses).
2. Open the food processor and check how sticky the dough is; it should be slightly tacky to the touch. If the dough is too sticky, add 1/4 cup more flour and continue processing, checking for stickiness again after the new flour has been incorporated. If the dough has formed into a single large ball, you may need to manually break up the ball before continuing to process after adding additional flour.
3. Remove the dough from the processor and press together. Knead by hand on the counter for a few times until the dough is a cohesive mass (maybe 5-10 times). If the dough is sticking to the counter, sprinkle the counter and your hands with flour.
4. Cut the dough into six even pieces, and cover them with plastic wrap (excluding the piece you'll work with first). Carry out the following steps with each piece of dough.
5. Roll the dough about 5-10 times through the largest-sized opening on your pasta roller, folding the dough in half between each rolling. By the end of this the dough should be smooth and satiny. If the dough sticks to the rollers or looks rumply after going through the rollers a few times, dust it with flour and continue rolling until it looks smooth and satiny.
6. Once the dough is the proper texture, you'll want to get it to the desired thickness. To do this, roll the dough repeatedly through the rollers, reducing the width of the opening between the rollers by one notch each time, until you reach your desired thickness. We stop at the penultimate thinness on our Imperia pasta machine for fettuccine, though the thinnest setting can be good for filled pastas. If the dough sticks or tears, simply go back to a larger size, fold the dough in half, and start again.
7. Place the rolled-out dough onto a towel, and let it dry for at least 15 minutes. This drying step helps prevent the pasta from clumping together when cut; if you're in a hurry you can skip this drying step.
8. Once the dough has dried a bit (so it's a bit less tacky, but nowhere near actually dry), roll it through the desired cutting attachment (or cut the dough by hand). Catch the pasta as it comes out of the cutting attachment, and carefully lay it flat on a towel-covered table. Ideally all the strands of pasta should be separated (so they won't stick), but we don't bother trying to separate all of it (as the pasta tastes just as good if a few strands are stuck together).
Making the sauce:
1. Melt the butter in a small saucepan over medium heat.
2. Add the garlic and cook for 2-3 minutes, or until the pasta is ready.
Cooking and serving the pasta:
1. Bring a pot of salted water to a boil.
2. Add the fresh pasta and cook until it's done; we find that two minutes is sufficient. Unlike dry pasta, we cook fresh pasta by time, as the pasta cooks so quickly that there isn't sufficient time to test it.
3. Drain the pasta thoroughly, and then put into a bowl.
4. Pour the butter and garlic sauce over the pasta and toss to mix.
5. Serve immediately, with plenty of grated cheese.
Notes:
You can mix the pasta by hand instead of using a food processor; in this case put the flour into a bowl, add the eggs, and mix with a fork until the dough comes together. Continue with the pasta-making steps as indicated above.
Many pasta recipes include instructions to knead the dough for 5-10 minutes after it's come together; we've found that just rolling the dough a few extra times in the pasta roller seems to suffice. Joy of Cooking reports that fresh pasta should be allowed to dry for about an hour before cooking; when we first posted this recipe we didn't do this, but now (January 2011) we are letting it dry for at least 15 minutes after rolling.
While we've seen a number of electric pasta rollers for sale, we've used a hand-cranked pasta roller for years, and are perfectly happy with it. However, if you're making pasta by yourself, a powered roller might come in handy as we find that having three hands helps when rolling out the pasta (one of us turns the crank while the other feeds the pasta into the machine and catches it as it comes out).
We've altered the flour amount from our original recipe (which called for 2 1/4 cups), as we've found that the dough consistently comes out far too moist and sticky in our kitchen. Recently we've been adding 2 1/2 cups of flour to the original mix, and then dusting each portion of kneaded dough a few times during rolling (probably using approximately 2 3/4 cups of flour total). The size of your eggs, moisture content of your flour, and other factors may cause you to need a different amount of flour than we use.
References:
Medici, L. 1992. Pasta (Williams-Sonoma Kitchen Library). C. Williams, ed. Time Life Books.
Rombauer, I. S., M. R. Becker, and E. Becker. 1997. Joy of Cooking. Scribner, NY.
[Revised January 16, 2011 to change flour amounts, clarify instructions, and add drying time]


No comments:
Post a Comment