Thursday, December 27, 2007

A nearly vegetarian Christmas dinner

Christmas dinner
Follow the link to see a labeled version of this image.

My SO and I regularly cook big holiday meals. As is traditional, these have typically featured a central meat course surrounded by a number of vegetable-based sides. Upon pondering what we wanted to cook for this year's Christmas dinner we realized, however, that when it came right down to it the central meat course wasn't really all that central. So, this year my SO and I decided to try a Christmas dinner without the central meat course. Here was our menu:
While the relatives we've described this to have been surprised by the lack of meat ("Not even a tofurkey?"), we hardly even noticed it. Our plates and bowls were full of diverse flavors and textures, and we were so stuffed by the time the sweet potatoes finally came out of the oven that neither of us even had any that night.

Saturday, December 22, 2007

Homemade grainy mustard

Every year my SO and I send out homemade holiday presents to our families. Our two most requested presents are our fruitcake and our mustard, and since we've made these recipes for nearly 10 years now, we figure it's time to share. I'll be posting the mustard today, followed followed by the fruitcake recipe in a few weeks (once we've had time to experiment some with the recipe).

Our mustard is made from whole yellow and brown mustard seeds that have been only partially crushed, and thus you get treated to little bursts of mustard flavor as you eat. The flavor is different from store-bought mustards: our mustard is sharper than most, doesn't taste as much of vinegar or turmeric, and has a hint of onions thanks to shallots. We have reports from family members that even though they've tried, they can't find anything like this in stores. Since we just got finished making our annual batch of mustard a few days ago1, it's this week's end-of-the-week recipe blogging post.

Note that this recipe requires a few days to soak the mustard seeds before making, and tastes best if left to mellow for a week or two before eating, so plan accordingly.

1/2 cup dry yellow mustard seeds
1/2 cup dry brown mustard seeds
1 cup rice vinegar
1 shallot, finely chopped
1 tablespoon kosher salt

1. Put the brown and yellow mustard seeds into separate containers and add approximately 3/8 cup (1/4 cup plus 2 tablespoons) of rice vinegar to each container. Cover each container tightly and let sit at room temperature for at least 2 days, stirring occasionally. If the mustard seeds end up looking dry during the soaking period, add a bit more vinegar to moisten.
2. Grind each type of mustard seed until many of the seeds have broken open (the seeds should start clumping together, and you'll start to see little bits of seeds in addition to whole seeds). For an artisanal feel, you can do this by hand with a mortar and pestle; it's a lot of hard work, and is guaranteed to make your grinding arm sore. For the lazy cook's mustard, put the seeds into a food processor and process with long pulses. It's best to grind the two types of seeds separately, as the yellow and brown mustard seeds grind at different rates.
3. Mix the mustard seeds, salt, shallot, and remaining vinegar (~1/4 cup) in a bowl. Add extra vinegar to bring the mustard to a nice paste-like consistency (it may take an extra tablespoon or so).
4. Transfer to jars and store in the fridge.

Notes:

Don't use aluminum cookware with this recipe, as it may react with the vinegar.

There's no need to use exactly 1/2 cup of each type of mustard seed; as long as you have a total of one cup of seeds you should be fine. The yellow seeds are milder than the brown seeds, so variations in proportions will change the sharpness of the final product.

We store the mustard in sealed jars in the fridge, though it may not require refrigeration (and we regularly ship it cross country without issue). The mustard keeps for a long time; we've kept jars in the fridge for more than a year and it still tastes great.

The recipe above makes a bit less than 2 cups of finished mustard. We typically make at least five times that amount (2 1/2 cups of each type of seed, ~2 cups of vinegar to soak each type of seed initially, 5 tablespoons kosher salt, 5 shallots, and 1 to 1 1/2 cups vinegar for mixing at the end), and as long as you're using a food processor for grinding you won't go crazy. In the past we've always hand-ground small batches of mustard; we only recently started using a food processor due to making large batches, and thus we're not sure how well a food processor will work with a small batch of mustard.

This recipe is based on one in Walden (1995), a book which wins the Radagast and SO award for best food photography.

Reference:

Walden, H. 1995. Sensational Preserves: 250 recipes for jams, jellies, chutneys, and sauces. Reader's Digest, NY.

1 And yes, this means that if you're a family member waiting for your holiday mustard shipment, your mustard is indeed in the mail.

Tuesday, December 18, 2007

It is done.

I'm pleased to report that the semester is finally over. I finished my grades last night, and this afternoon I finished off all the fiddly end-of-semester work that I'd been putting off. My e-mail has an away message, my voice mail won't be checked for weeks, and I have nothing I need to do for work until January. Ahhhhhh.

How did I celebrate? By coming home and taking a nap.

Friday, December 14, 2007

Stay on target ...

The end of the semester has proven to be insanely busy. Even though many instructors at my college have already turned in their grades, I still have dozens of papers to grade and haven't even given my last final exam yet. This is even though my SO has been querying me for my name when I arrive home, thanks to me working solid 10 or 12 hour days for at least the last two weeks (including weekends).

Making things even more "fun" is that I've had the "pleasure" of turning in more than a dozen different students for plagiarizing this semester, most of them in the past week and a half. I've even set a new personal record for the greatest fraction of plagiarizers in a course: 50% of the completing class.

More to come once grades are in.

Thursday, November 22, 2007

Happy Thanksgiving!

Yes, I am indeed still alive. My prior post on the topic of why I haven't been posting still applies: my new online course is keeping me insanely busy, and whatever spare time I have is being spent either sleeping, playing the guitar, or shopping for a new classical guitar. The only change I'd make to my prior post is to eliminate the "not stressed" part: I've fallen weeks behind on grading large assignments, and have barely been getting my online course's units created on time.

The online course is still going well; I'm learning a lot, and I think the students are learning at least a little something. Right now my completion rate looks like it's going to be around 2/3 of the initially enrolled students, which I consider to be pretty good for my first try (we've reportedly had online courses with completion rates of <25% at my campus). I'm already looking forward to teaching the course again in the spring. I'm also looking forward to winter break, when I'll have time to start writing more here.

I hope you have a relaxing, food-filled Thanksgiving!

Sunday, October 28, 2007

Butternut squash soup

A few months ago my SO and I bought some butternut squash soup at Trader Joe's. We were impressed by the soup's smoothness and squashy flavor, and thus decided to try making a squash soup on our own. We just did that today, and the results were fantastic: the soup was thick and smooth, and filled with the flavors of sweet squash, spicy ginger, and savory onions. We roasted the squash's seeds along with the squash itself, and they made a great topping for the soup (they added concentrated bits of roasty flavor). This soup also has the benefit of being insanely healthy. Since we enjoyed this so much, it's this week's end-of-the-week recipe blogging post.

3 to 3 1/2 lb. butternut squash, whole
Enough vegetable oil to lightly coat the squash seeds and a roasting pan
3 tablespoons butter, unsalted
1 medium onion, chopped
2 scallions, chopped
4 teaspoons minced fresh ginger
6 cups chicken or vegetable stock
1 1/2 teaspoons kosher salt (plus extra for salting the squash seeds, if desired)

To make this recipe you need to first roast the squash, and then let it cool before making the soup.

Roasting the squash:
0. Preheat your oven to 400F.
1. Wash the squash and cut it in half lengthwise. Be careful while doing this, as winter squash skin can be extremely tough.
2. Using a spoon, scoop out the squash seeds (and the tissue holding them into the squash) and put them into a bowl.
3. Coat a baking pan with a thin layer of vegetable oil, place the squash cut-side down on this pan, and then bake at 400F until the squash is done (one hour or so; the skin should be browned and the flesh should be soft and easily pierced).

Roasting the squash seeds (optional):
1. Separate the squash seeds from the squash flesh; this is probably most easily done with your hands. After you've separated the seeds, put them into a bowl or strainer and wash until most of the squash goo is gone.
2. Mix the squash seeds with enough vegetable oil to coat, and put into a pan that's large enough to hold the seeds in a single layer.
3. Bake in a preheated 400F oven until lightly browned, approximately 5-10 minutes. We baked these along with the squash, though if your oven is too small for that, it would be fine to roast them after the squash is roasted.
4. Remove from the oven, sprinkle with salt, and stir.

Making the soup:
1. Once the squash has cooled, scoop the flesh of the squash out of the skin; set the flesh aside until needed.
2. Heat the butter in a large non-stick pot over medium-high heat.
3. Once the butter has melted, add the onions, scallions, and ginger, and cook until the onions are softened and just starting to brown (about 5-10 minutes).
4. Add the roasted squash flesh and four cups of the chicken stock. Bring to a boil and simmer, uncovered, for 20 minutes.
5. Add the salt and the remaining two cups of chicken stock and puree the soup until smooth. We did this using an immersion blender, but a standard blender should work fine. If your blender is volume limited, you might want to blend the soup before adding the final two cups of chicken stock.
6. Serve the soup (heating it on the stove if necessary to bring it to your preferred temperature). Garnish with the roasted squash seeds, if desired.

Notes:

Radagast's SO enjoyed the soup with a sploosh of cream stirred into a bowlful, but Radagast preferred the soup without the cream. The cream made the soup creamier (who'd have guessed?), and seemed to mellow the flavor some.

The squash seeds make a tasty snack all on their own, so even if you don't think you'll like them in the soup, you may want to try roasting them anyway.

This recipe is modified from one Joy of Cooking (Rombauer et al. 1997). The original recipe used two leeks instead of the onions and scallions; we didn't have leeks on hand.

Rombauer, I. S., M. R. Becker, and E. Becker. 1997. Joy of Cooking. Scribner, NY.

Sunday, October 14, 2007

Busy, yet not stressed

As regular readers can probably guess by my posting frequency, I've been busy lately. As I predicted at the start of the semester, my new online course has been consuming any time it can get its hands on: I'm easily spending at least 15-20 hours each week developing the content for it, and at least as much time in the course interacting with the students and grading their work. Add that to my regular in-person lecture and lab classes, and I'm one busy grasshopper.

I'm enjoying the new course tremendously, and even though I've been extremely busy, I haven't been overly stressed. The course is thankfully small, which means that I have enough time to get to know the students, and I can assign regular written assignments and give the students copious feedback on those. Creating material for the new course is a ton of fun; writing the material is much like blogging (all I'm doing is writing general summaries of basic biological content for a non-scientist audience), and finding artwork has been an enjoyable challenge (I'm attempting to build the course entirely from open-licensed artwork). I'm already looking forward to having time in future semesters to revise what I've created.

The biggest complaint I've gotten from students so far is that the course is too much work and that the exams are too hard. Since this is likely one of the first college-level science courses these students have taken, and these students have surely been exposed to the "online courses are easy" myth, this isn't surprising. It's hard to explain nicely that yes, this course is in fact challenging, and that no, I'm not going to make the tests easier.

Outside of work I'm not doing a whole lot other than taking another guitar class1. This class requires far less time than my summer course (thankfully), but it's been an enjoyable distraction, and has helped motivate me to keep playing. It's hard to believe that six months ago I didn't even have a guitar, but now I can (slowly) play a growing number of tunes (the most complex of which are probably Dust in the Wind and Vals by Calatuyud).

1 And attending a super-cool Genesis concert at the Hollywood Bowl. It was such a good concert that I didn't mind getting rained on for half of the concert, that they ended the concert a few songs early due to the rain (though I sorely missed hearing Carpet Crawlers), or that we got stuck in (non-concert) traffic on the freeway at 1:30am.

Sunday, September 30, 2007

Los Angeles Guitar Quartet's Brazil concert

A few weeks ago my SO and I attended the Los Angeles Guitar Quartet's CD release party concert for their newest album: LAGQ Brazil. LAGQ is a four-man classical guitar quartet that's been around for more than 20 years, but which I just learned about this summer thanks to one of my guitar instructors.

The majority of the concert consisted of the quartet sitting in chairs playing their classical guitars. There was very little showmanship, but they didn't need any; we managed to get front-row seats, and I spent the entire two hours mesmerized by their playing. The group played a range of pieces including Bach's Bandenburg Concerto #6, the Overture to the Barber of Seville, Manuel de Falla's El Amor Brujo, and a number of tracks from their Brazil album (including Jorge Ben's Mas Que Nada). I'm no expert in classical guitar, but I was amazed by the guitarists' skill: their hands flew over the strings, and the fluidity, speed, and apparent effortlessness of their movements were awe-inspiring. I've started listening to a lot of solo classical guitar music in the past few months, and the complexity of the quartet's music was a refreshing contrast.

The quartet ended the concert by playing four songs with Katisse Buckingham and Kevin Ricard, the woodwindist and percussionist they recorded with on their CD. These two musicians made for a great end to the concert, though sadly the group implied that they wouldn't be touring with them.

LAGQ isn't going to be traveling to many cities on their tour (see their schedule here), but if you're lucky enough to be in one of the cities they're going to, and are at all interested in classical guitar, I'd highly recommend attending.

Radagast and SO's Summer Bounty Super-Hot Hot Sauce

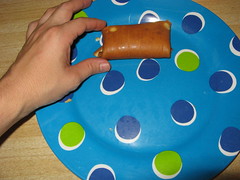
My SO and I decided to diversify our pepper planting this summer by growing some Jamaican Hot Chocolate peppers, in addition to the jalapeƱos that we usually grow. Jamaican Hot Chocolates are very pretty (they ripen to a nice chocolate brown), but as they're a close relative of habaneros, they're extremely hot: they score about 100,000 to 200,000 scoville units, whereas jalapeƱos score around 2,000 to 10,000 scoville units. A friend of ours grew the same peppers, and reported that touching his eye after cutting one pepper in half resulted in hours of searing pain.

We, quite honestly, didn't know what to do with the peppers. So, they piled up on our counter; eventually we decided that we had to do something with them, and thus we created "Radagast and SO's Summer Bounty Super-Hot Hot Sauce." We took inspiration from a few hot sauce recipes we found online.

We've never used hot sauces regularly before, but we both love this hot sauce. While it's packed with heat (a tiny dab on a spoonful of rice is enough to make our mouths burn), it has a rich smoky flavor that goes well with many dishes, and it doesn't have the strong vinegar flavor that some hot sauces do. So far we've added it to tuna melts, mac and cheese, roasted asparagus, tomato soup, tomato pasta sauce, and had it on chips, and it's been great in everything (note: we're adding tiny amounts to each of these; often less than 1/8 of a teaspoon to a full serving). We can't wait to add it to a pot of chili.

Since we never thought we'd be adding hot sauce to our recipes, this is this week's end-of-the-week recipe blogging post.

CAUTION: See safety instructions before working with the peppers.

20 Jamaican Hot Chocolate peppers, seeded, deveined, and quartered (habaneros would probably be a fine substitution)
18 red jalapeƱos, seeded, deveined, and quartered
1 pound whole tomatoes, peeled and seeded
1 20-oz can crushed pineapple, in juice
~20 garlic cloves, minced or pressed with a garlic press
2 1/4 cups white vinegar
1 cup brown sugar
1/2 cup dry mustard powder
4 tablespoons paprika (we used a mix of smoked Spanish and regular)
3 tablespoons kosher salt
2 tablespoons ground black pepper
2 tablespoons cumin
1 teaspoon ground coriander
1 teaspoon ground cumin
1 teaspoon ground allspice

0. Get out all kitchen implements that you may require during cooking before handling any of the peppers. Prepare a vegetable oil rinse station (see below), have plates or other washable spoon rests ready near all work areas, put on your gloves and goggles, and have paper towels at the ready so you can hold non-washable items without getting capsaicin all over them.
1. Add all ingredients to a blender and blend until smooth. This may require multiple batches of blending. Ensure that the top of the blender is firmly attached (and any holes are sealed) to prevent sauce from being flung around the room.
2. Carefully transfer the blended ingredients to a pot that is large enough to have absolutely no risk of the sauce boiling over.
3. Bring the sauce to a simmer over medium-high heat, and simmer for 20 minutes on the lowest possible heat that will maintain the simmer. Be extremely careful not to bring the sauce to a full boil, as that will drastically increase the risk that sauce gets splattered all over you and your kitchen.
4. Carefully decant the sauce into prepared jars (see notes).
5. Thoroughly wash anything that you touched after handling the peppers before removing your gloves; we recommend running items through a dishwasher multiple times.
6. Remove your gloves and throughly wash your hands with vegetable oil, followed by soap and water.

Safety instructions:

The compound in peppers that causes the "heat" is capsaicin. Capsaicin is lipophilic, which means that it can diffuse straight through your skin and cause pain wherever you come into contact with it (hands, face, eyes, genitals, etc.). Capsaicin does not wash off completely with regular soap and water, and thus I would never recommend handing cut Jamaican Hot Chocolates or habaneros with anything but gloved hands (we used latex gloves). In addition, I'd strongly recommend wearing goggles, a long-sleeved shirt, long pants, and socks when making this hot sauce. It wouldn't be going overboard to consider a face-shield and a respirator; at the very least make sure your work area is extremely well ventilated, as even the fumes are strong.

Probably the best method to get capsaicin off of your skin is to scrub with pure vegetable oil. If you do accidentally get capsaicin on your skin (you'll know if you do), immediately wash the affected area with vegetable oil, followed by soap and water (note, however, that this will not remove all the capsaicin, and there will likely be nothing you can do to stop the pain).

Make absolutely sure that all utensils, pots, and other items you touch with capsaicin-tainted hands are washed thoroughly before handling them bare-handed. Even after wearing gloves to cook the entire dish, we wash our hands with vegetable oil first, followed by soap, and try to refrain from touching sensitive parts of our bodies for the rest of the day.

Notes:

Peppers can vary widely in the amount of capsaicin they contain. We would thus suggest that you assume that you're using the hottest peppers ever grown, and taste only the tiniest dab of your final hot sauce before trying it in larger quantities. We find that, with our peppers, a dab the size of half a rice grain is plenty to flavor an entire chip (though note that we're relative wimps when it comes to spice).

This recipe makes more than six cups of hot sauce. To store the sauce, we suggest canning it. While we'll leave it up to other sources to provide full canning protocols, what we do is boil clean jars, their lids, and any implements we'll need to handle the jars and put sauce into them (including tongs and a funnel) for 10 minutes in a covered pot, then turn off the heat and leave the pot covered until we're ready to use the jars. When we're ready to decant the sauce we remove the jars from the pot with tongs, ladle the piping-hot hot sauce into the jars and immediately seal them with lids. We let the jars cool at room temperature before labeling them and moving them to the fridge.

And, as a final note, we have no idea how important the various spices are to the final flavor. Given the small quantities of sauce required to flavor items, we're probably approaching homeopathic dilutions for some of the spices; thus, it's likely that at least some of the spices could probably be left out without affecting the flavor.

Sunday, September 16, 2007

Armadillo eggs (jalapeƱos stuffed with cream cheese and wrapped in bacon)

Growing jalapeƱos at home is fun, but we often find that we run out of uses for them. A local friend, however, has kindly solved that problem by introducing us to armadillo eggs. Armadillo eggs are halved jalapeƱo peppers filled with cream cheese and wrapped in bacon; they can be cooked on the grill or baked, and in either case are absolutely delicious. The fire of the jalapeƱos is cooled by the cream cheese, and the bacon wrapper is just a dazzling treat. Since we've made a few batches of these in the past few weeks, they're this week's second end-of-the-week recipe blogging post.

JalapeƱo peppers (we use red jalapeƱos, but green are fine as well)
Cream cheese (~1 tablespoon per whole pepper)
Bacon (1 strip per whole pepper)

0. Preheat your oven to 425F.
1. Remove the stem from the jalapeƱos and cut in half. Scrape or cut out the seeds and ribs.
2. Fill the cavities of the halved jalapeƱos with strips of cream cheese.
3. Wrap each halved jalapeƱo in a half strip of bacon, and arrange on a foil-lined baking sheet.
4. Bake in a 425F oven until the bacon is crispy, approximately 25-30 minutes. The exposed parts of the cream cheese and jalapeƱos will likely be starting to brown; the bottoms of our jalapeƱos often are blackened, but taste fine.
5. Let cool for a few minutes, and then serve immediately.

Note:

JalapeƱos contain capsaicin (the chemical that makes peppers hot), a lipophilic compound that easily diffuses through skin and can cause extreme pain, so handle with care. Do not touch your eyes (or other sensitive body parts) while handling peppers. Once you're done handling the peppers, wash your hands with vegetable oil prior to washing thoroughly with soap and water.

Homemade fettuccine with butter and garlic sauce

Fresh pasta is a treat; it has an eggy flavor, and a different texture than dried pasta (though describing exactly how it's different is difficult). My SO made some fresh pasta for a special dinner recently, and today we cooked up another batch for breakfast. Fresh pasta is tasty enough that it barely needs any sauce at all; today we had it with butter, garlic, and grated cheese. Since making this reminded us of how relatively easy fresh pasta is to make (just look at the ingredients list!), it's this week's end-of-the-week recipe blogging post.

Note: A pasta roller, such as the one below, makes rolling out and cutting the pasta much easier.


A hand-cranked pasta roller similar to the one we have; Creative Commons image by Allerina & Glen MacLarty

Update January 2011: The fresh pasta made with this recipe can be used with many different sauces; our most frequent pairing over the past few years has been to serve it with our alfredo sauce.  A half recipe of each makes enough for a filling meal for the two of us. 

Fettuccine Alfredo
Fettuccine alfredo made with fresh pasta; sauce recipe is here.


Fresh pasta (makes ~1 pound of pasta):
2 1/4 - 3 cups flour (all-purpose flour is fine)
4 large eggs
salt for the cooking water (about 1 tablespoon of salt per gallon of water)

Garlic butter sauce (enough for ~1 pound of pasta):
12 tablespoons butter
2 medium cloves garlic, peeled and finely minced or pressed with a garlic press
Grated pecorino romano cheese, for serving (at least 1/2 cup, though vary to your tastes)

Making the pasta:

0. You'll need plenty of flat, towel-covered table or counter space to hold the pasta after it's been rolled out.
1. Put 2 1/4 cups of flour and the eggs into a food processor and process until the dough begins to come together (about a minute; it's probably best to do this in a number of long pulses).
2. Open the food processor and check how sticky the dough is; it should be slightly tacky to the touch.  If the dough is too sticky, add 1/4 cup more flour and continue processing, checking for stickiness again after the new flour has been incorporated.  If the dough has formed into a single large ball, you may need to manually break up the ball before continuing to process after adding additional flour. 
3. Remove the dough from the processor and press together. Knead by hand on the counter for a few times until the dough is a cohesive mass (maybe 5-10 times). If the dough is sticking to the counter, sprinkle the counter and your hands with flour.
4. Cut the dough into six even pieces, and cover them with plastic wrap (excluding the piece you'll work with first).  Carry out the following steps with each piece of dough. 
5. Roll the dough about 5-10 times through the largest-sized opening on your pasta roller, folding the dough in half between each rolling. By the end of this the dough should be smooth and satiny. If the dough sticks to the rollers or looks rumply after going through the rollers a few times, dust it with flour and continue rolling until it looks smooth and satiny.
6. Once the dough is the proper texture, you'll want to get it to the desired thickness.  To do this, roll the dough repeatedly through the rollers, reducing the width of the opening between the rollers by one notch each time, until you reach your desired thickness. We stop at the penultimate thinness on our Imperia pasta machine for fettuccine, though the thinnest setting can be good for filled pastas. If the dough sticks or tears, simply go back to a larger size, fold the dough in half, and start again.
7. Place the rolled-out dough onto a towel, and let it dry for at least 15 minutes.  This drying step helps prevent the pasta from clumping together when cut; if you're in a hurry you can skip this drying step.
8. Once the dough has dried a bit (so it's a bit less tacky, but nowhere near actually dry), roll it through the desired cutting attachment (or cut the dough by hand). Catch the pasta as it comes out of the cutting attachment, and carefully lay it flat on a towel-covered table. Ideally all the strands of pasta should be separated (so they won't stick), but we don't bother trying to separate all of it (as the pasta tastes just as good if a few strands are stuck together).

Making the sauce:

1. Melt the butter in a small saucepan over medium heat.
2. Add the garlic and cook for 2-3 minutes, or until the pasta is ready.

Cooking and serving the pasta:

1. Bring a pot of salted water to a boil.
2. Add the fresh pasta and cook until it's done; we find that two minutes is sufficient. Unlike dry pasta, we cook fresh pasta by time, as the pasta cooks so quickly that there isn't sufficient time to test it.
3. Drain the pasta thoroughly, and then put into a bowl.
4. Pour the butter and garlic sauce over the pasta and toss to mix.
5. Serve immediately, with plenty of grated cheese.

Notes:

You can mix the pasta by hand instead of using a food processor; in this case put the flour into a bowl, add the eggs, and mix with a fork until the dough comes together. Continue with the pasta-making steps as indicated above.

Many pasta recipes include instructions to knead the dough for 5-10 minutes after it's come together; we've found that just rolling the dough a few extra times in the pasta roller seems to suffice. Joy of Cooking reports that fresh pasta should be allowed to dry for about an hour before cooking; when we first posted this recipe we didn't do this, but now (January 2011) we are letting it dry for at least 15 minutes after rolling.

While we've seen a number of electric pasta rollers for sale, we've used a hand-cranked pasta roller for years, and are perfectly happy with it. However, if you're making pasta by yourself, a powered roller might come in handy as we find that having three hands helps when rolling out the pasta (one of us turns the crank while the other feeds the pasta into the machine and catches it as it comes out).

We've altered the flour amount from our original recipe (which called for 2 1/4 cups), as we've found that the dough consistently comes out far too moist and sticky in our kitchen.  Recently we've been adding 2 1/2 cups of flour to the original mix, and then dusting each portion of kneaded dough a few times during rolling (probably using approximately 2 3/4 cups of flour total).  The size of your eggs, moisture content of your flour, and other factors may cause you to need a different amount of flour than we use.

References:

Medici, L. 1992. Pasta (Williams-Sonoma Kitchen Library). C. Williams, ed. Time Life Books.

Rombauer, I. S., M. R. Becker, and E. Becker. 1997. Joy of Cooking. Scribner, NY.

[Revised January 16, 2011 to change flour amounts, clarify instructions, and add drying time]

Sunday, September 02, 2007

Another semester begins!

Another semester has started at Rhosgobel U. This summer was filled with fun visitors, an amazingly productive garden (we've been harvesting pounds of fresh tomatoes, peppers, and beans every week for the past month), and lots of rest and relaxation. This was a contrast to the past few summers (when I've done field work out of the country during the summers), and thus I'm feeling much more rested and relaxed than in recent years.

Regular readers will note that I've been silent for a while; I apologize for this, and should explain it. The primary culprit, as one would expect, is that other avenues have started taking up my time. First on the list is that this semester I'm creating a new online course from scratch. While I'm enjoying this (I've been planning something like this for years), it also means that all of my writing time is now dedicated to the course.

Additionally, I've found that I really enjoy playing the guitar. My summer course was a blast, and thanks to it I've improved a lot (though I'm still a complete novice). The course took a tremendous amount of time (at least 15 hours a week combined in class and practicing), and I'm still practicing for an average of half an hour a day. I'm finding that when I've got some spare time, I don't sit down at the computer (or, rather, I don't continue sitting at the computer), but instead wander over and pick up the guitar. Right now I'm focusing on classical guitar, and might even be buying a new classical guitar soon ( since I “need” a classical guitar to play classical music).

But never fear, kind reader, I'm not going to tell you I'm quitting writing. I've enjoyed this for too long to do that. Instead, I'll be reducing my frequency of posting; so, I'd expect something about weekly, though I give no guarantees.

That said, here's looking forward to an exciting semester filled with new things.

Sunday, August 19, 2007

Radagast and SO's creamy chicken pasta

My SO and I love making creamy pasta sauces (e.g., sun-dried tomato and sausage cream sauce pasta, garlic and clam cream sauce pasta, and fettucine alfredo), but a few weeks ago we were in the mood for a chicken-based cream sauce, which we didn't have a recipe for. Thus, we decided to experiment a bit, and came up with a sauce that was filled with garlic, sauteed chicken, sun-dried tomatoes, and creamy goodness. We made the sauce again today, adding some spinach and basil, and came up with this dish. While eating we realized that this reminds us of pasta dishes we've had at places like the Olive Garden or Macaroni Grill; the similarity is unintentional. Since we enjoyed this so much, it's this week's end-of-the-week recipe blogging post.

1/2 to 3/4 pounds chicken (we use boneless, skinless chicken thighs)
Salt and ground black pepper
3 tablespoons olive oil
8 garlic cloves, peeled and minced or pressed with a garlic press
8 sun-dried tomato halves, chopped (we use oil-packed tomatoes)
1/4-1/2 teaspoon crushed red pepper
1/2 cup chicken stock
1/4 cup white wine
4 cups loosely packed fresh spinach
2/3 cup heavy cream
1/4 cup loosely packed chopped fresh basil
1/3 cup grated Pecorino Romano cheese, plus extra for serving
1/2 pound dry pasta (we've used fettuccine and penne)

0a. Cook the pasta in salted water until it is al dente. When cooked, drain the pasta, but do not rinse with water. Work on the sauce (steps 1-9) while the pasta is cooking, though schedule your cooking so the pasta is done just a little before it needs to be added to the sauce (in step 10). We usually start the pasta cooking at around the same time we start sauteing the chicken.
0b. Have the garlic, sun-dried tomatoes, red pepper, chicken stock, wine, and spinach ready to add before you start sauteing the chicken, as they need to be added in quick succession once the chicken is finished. Chopping the basil wouldn't be a bad idea either.
1. Trim the excess fat from the chicken and slice it about 1/2"-thick. Sprinkle with a couple pinches of salt and ground black pepper.
2. Heat the olive oil in a large saucepan over medium-high or high heat. Once the oil is hot, add the chicken. Flip the chicken pieces once the bottoms are well browned, and continue sauteing until they're well browned on their other side. Remove the chicken pieces, leaving the oil in the pan. See the notes section for more information on this step.
3. Immediately add the garlic to the pan and cook, stirring constantly, until the garlic starts to brown (usually about a minute or less).
4. Add the sun-dried tomatoes to the pan and stir for another 30 seconds (or until the garlic is starting to get well browned).
5. Add the crushed red pepper and cook, stirring, for a few seconds.
6. Add the chicken stock and wine, and bring the contents of the pan to a simmer. Reduce the heat, adjusting it during the following steps to maintain a simmer.
7. Add the spinach, stirring to mix. Once the spinach has wilted, add the reserved chicken and continue simmering, stirring occasionally, until the liquid is reduced in volume by approximately half (a few minutes).
8. Add the cream and basil, and simmer until the sauce is a good consistency to coat the pasta, stirring frequently; this usually takes 2-4 minutes.
9. Once the sauce is thickened, mix in the cheese.
10. Add the drained pasta, mix well, and serve with additional grated cheese (if desired).

Notes:

Adding whole spinach leaves results in lots of long pieces of wilted spinach in the dish; we enjoy the texture this adds, but if you think you won't, feel free to chop the spinach before cooking it. You could probably substitute dried basil and frozen spinach for their fresh counterparts without issue (making sure to reduce the volumes added to compensate for their dried and/or frozen states). And, as I alluded to in the introduction, we've also made a version of this without spinach and basil; in that version we substituted 1/2 teaspoon ground sage for the basil (adding the sage along with the crushed red pepper), and left the spinach out entirely. We like the spinach and basil version better, but the sage version is good too.

If you have oil-packed sun-dried tomatoes, and want even more sun-dried tomato flavor, try using 3 tablespoons of the oil from the sun-dried tomatoes in place of the olive oil.

Sauteing the chicken properly is key to adding a lot of browned chicken flavor to this dish. To do this, try to stir the chicken as little as possible once it's been added to the pan, and only flip the chicken once it's golden brown on the first side. Once the sauteing is complete there will probably be lots of little fried bits of chicken left in the pan; by using this pan and the oil still in it for the rest of the dish, you're adding all this flavorful goodness to the rest of the dish.

If, while cooking, you suspect that the pasta won't be ready in time, lower the heat during the simmering (steps 7 and 8) to slow the thickening of the sauce.

This recipe is based on the style of cream sauce in our sun-dried tomato and sausage cream sauce pasta and garlic and clam cream sauce pasta recipes, which we obtained from Weinstein and Scarbrough (2002).

Weinstein, B., and M. Scarbrough. 2002. "How to Make a Light Creamy Pasta Sauce." Fine Cooking 50: 45-49.

Sunday, August 12, 2007

Kidney beans with smoked turkey

Whenever my SO and I go to fairs we love getting smoked turkey legs. The only problem is that we rarely finish them at the fair; since my SO and I ended up with half of a smoked turkey leg left over from a recent trip to a fair, we decided to add it to some kidney beans cooked with onion and spices. We were improvising the entire time, but the dish smelled delicious as it was cooking (Radagast thought a neighbor was barbequeing, until he realized he was smelling this dish), and was thick, creamy, and savory once it was done. It's difficult to describe exactly what this dish is like; it falls somewhere in within the triangle of refried beans, an Indian dal, and bean soup. It's this week's second end-of-the-week recipe blogging post.

2 tablespoons vegetable oil
1/2 medium onion, chopped
3 medium carrots, peeled and cut into rounds
1 red jalapeno (or other fresh chili) pepper, deveined, seeded, and sliced into thin strips about 1-2cm long
4 cloves garlic, finely minced or pressed with a garlic press
1/2 teaspoon cumin
12 peppercorns
6 cloves
2 bay leaves
6 1/2 cups water
3/4 pound dry kidney beans
1/2 of a large smoked turkey leg, bone-in (a chunk of ham should be a fine substitute)
1 teaspoon kosher salt

1. Heat the oil in a pot over medium-high heat. Once the oil is hot, add the onions and carrots and cook, stirring nearly constantly, until the onions turn translucent.
2. Add the jalapeno pepper and continue cooking, stirring nearly constantly, until the onions have turned light brown.
3. Add the garlic and cook a minute or two more.
4. Add the spices and cook for another 30 seconds or so.
5. Add the water, beans, smoked turkey, and salt; stir to mix.
6. Simmer for 2-3 hours, or until the beans are tender and the dish is thickened (it should be the consistency of thin refried beans or a dal; it should not be soupy). Check (and stir) the dish occasionally; add extra water if the dish is drying out. We simmered the dish partially covered for the first hour, and then covered for the remainder of the time. You can mash the cooked beans with a spoon to give the dish a creamier texture, if desired.
7. Once the beans are mostly cooked (during step 6), take out the turkey leg and let it cool. When the turkey leg is cool enough to handle, remove all the meat from the bone (chopping any particularly large pieces) and return the meat to the pot. This can be done anytime after the beans have been cooking for a while.
8. Taste to check the salt level (it may be low for your tastes), adjust to your preference, and then serve.

Notes:

This was another improvised dish, so the proportions are approximate and feel free to play with the ingredients. This tasted great served with Spanish rice, a recipe we'll post once we have the chance to test it out again.

Keep an eye out for the whole spices as you're eating the dish; while they're not harmful to eat, you might want to pick them out if you can find them.

Fresh green bean and tomato salad

Green bean and tomato salad

Our garden has been doing well this year, and thus we've had an abundance of tomatoes, green beans, and basil on our hands. Faced with pounds of green beans and tomatoes just asking to be eaten, my SO created this salad. The lime juice and feta cheese contrasted well with the fresh vegetables, and overall this made for a great (and healthy) summer meal. Since we just made this today, it's this week's end-of-the-week recipe blogging post.

Salad:
2 pounds fresh green beans, washed, trimmed, and halved
1 pound tomatoes, chopped into bite-sized pieces
1/2 small onion, ~1/4 to 1/2 cup, quartered and thinly sliced
~1/2 to 3/4 cup crumbled feta cheese

Dressing:
1 shallot, finely minced
1 tablespoon whole-grain mustard
1/2 teaspoon ground black pepper
3/4 teaspoon kosher salt
1/2 cup coarsely chopped fresh basil, loosely packed
juice of 2 large limes
1/2 cup extra virgin olive oil

To make the dressing:
1) Add all the dressing ingredients to a salad shaker (or a bowl) and mix until combined. Let stand a few minutes before using.

To make the salad:
1) Cook the green beans. To do this, bring a large pot of salted water (~1 1/2 tablespoons salt per 12 cups water) to a boil, add the beans, and cook until they're tender (~4-10 minutes; the time will vary depending on the maturity of your beans, so check them periodically).
2) Remove the cooked beans from the boiling water and immerse them in a bowl of cold water. Once they've cooled, transfer them to a strainer to drain off most of the water.
3) Put the cooled green beans, tomatoes, onion, and feta into a large bowl. Add as much of the dressing as you want (we added approximately a cup) and mix gently but thoroughly.
4) Serve immediately.

Notes:

Since this was made without a recipe, all amounts are approximate and flexible; feel free to improvise. And, as with our tomato yogurt salad, this probably requires good fresh vegetables (especially good tomatoes) to be tasty.

As we reported with our honey mustard salad dressing, we make our own whole-grain mustard from scratch (see the recipe here); if you don't have whole-grain mustard available, we'd suggest substituting a grainy mustard.

We ended up with about a half cup of dressing left over; if you don't want extra you may want to scale down the dressing ingredients a bit.

The green bean cooking instructions are from Joy of Cooking.

Reference:

Rombauer, I. S., M. R. Becker, and E. Becker. 1997. Joy of Cooking. Scribner, NY.

[Updated December 2007 to add a link to our homemade mustard recipe.]

Tuesday, August 07, 2007

Ordering glasses online part 2: getting the glasses

About a month ago I reported that my SO and I had ordered some glasses from Optical4Less, an online retailer. As the glasses have now arrived, I wanted to post an update.

Our glasses arrived in the mail about a week and a half after we placed the order. The glasses were wrapped in a cloth and bubble wrap, placed in a hard case, and then shipped in a cardboard box. My glasses (a metal and plastic semi-rimless pair) arrived in perfect condition; all I had to do was adjust the nosepieces (which bent easily with my fingers) and they fit perfectly. I've been wearing them every day since, and haven't had any problems. While I can't verify that the prescription is completely correct, I'm seeing more clearly than I have in years 1.

My SO's glasses arrived in apparently perfect condition, but upon close inspection we discovered that the lenses had several patches of minute scratches that caused blurred vision in a few spots. Our best guess is that the anti-reflective coating had been damaged during the lens shaping/installation, though we don't know exactly what happened.

Optical4Less responded to our e-mail about the problem within a day, and requested pictures of the lenses. Getting a good picture of the scratches proved challenging (as they were small and nearly transparent), but we eventually got a few good pictures and submitted them. Optical4Less got back to us the next business day and told us to mail the glasses back so they could be remade; this cost us about $4. Upon receipt of the glasses, Optical4Less gave us an $8 gift certificate good towards our next purchase.

A few days ago (about two weeks after returning the glasses), we got the replacement pair in the mail, and my SO reports that they're perfect.

Thanks to our success with Optical4Less we've already ordered more pairs (my favorite is a $35 pair of prescription sunglasses from Zenni Optical). So far we've ordered seven pairs of glasses from various retailers, and we've still spent less than it would have cost to buy one pair of glasses at our local optician. We'll never buy from our local store again.

1 It had been more than five years since my last pair of glasses was made (in part due to the price of new ones), so the change was fairly major.

Monday, August 06, 2007

Ubuntu once again beats Windows

Regular readers will likely remember my post comparing the time it took me to install Ubuntu and Windows XP (it was, after all, my most-commented post of all time). I'm happy to report that I now have a new (albeit much shorter) installment for that series.

I recently got a new Toshiba tablet laptop1 which came with Windows XP pre-installed (albeit fiddled with by a few technicians before I got my hands on it). While the tablet works fine in Windows, upon booting it at home I discovered that Windows refused to connect to my wireless network (Intel's wireless program reported that the wireless card was disabled, while Windows hardware manager begged to disagree). After fiddling with it for a bit, I gave up and booted into Ubuntu 7.04 using a LiveCD. Within less than a minute of booting I had a working wireless connection, and I had a completely functioning permanent install in less time than it took me to make a peach pie2. I was even able to use the stylus for navigation as soon as Ubuntu booted.

1 While I initially scoffed at the idea of using a stylus to write on the screen when I was considering what my new computer would be, I'm now in love with my little stylus. Using the stylus to navigate is intuitive, and I already find myself defaulting to the stylus over the built-in mouse.
2 Yes, I actually installed Ubuntu during the spare time I had while making a peach pie. The installation is that easy.

Sunday, July 29, 2007

Cheese blintzes

Cheese blintzes are thin pancakes that are folded around a sweet cheese filling and then baked or fried so they have a crispy crust. They're are one of my SO's favorite breakfast foods, and thus they appear regularly at birthday breakfasts. Since I made these for my SO's most recent birthday, they're this week's end-of-the-week recipe blogging post.

Blintz batter:
1 1/2 cups flour
1 1/2 cups milk
4 large eggs
3 tablespoons butter, melted
1 tablespoon sugar
Pinch salt
Butter or oil for cooking the blintzes

Cheese filling:
2 1/2 cups drained small-curd cottage cheese (~20-ounces)
4 ounces cream cheese
2 large eggs
1/4 cup sugar
2 teaspoons vanilla
1/2 teaspoon salt

To make this recipe you need to make the blintz batter and cook it, make the filling, and then fill the blintzes and cook them.

To make the blintz batter:
1. Add all the ingredients for the blintz batter to a blender or food processor and blend or process until smooth, scraping down the sides as necessary.
2. Refrigerate the mixture for at least 30 minutes before cooking.

To make the filling:
0. Drain extra liquid from the cottage cheese: put it into a strainer and let it sit for about half an hour. This step could probably be skipped if you're in a hurry.
1. Add the drained cottage cheese, cream cheese, eggs, sugar, vanilla, and salt to a blender or food processor and process until well mixed. There should be no large lumps left after mixing; chill until needed.

To cook the blintzes:
0. Get out your supplies and arrange them around the stove. You'll need a small to medium non-stick pan, the blintz batter, a measuring device for the batter (a 1/8 or 1/4 cup measurer works well), a spatula to remove the blintzes from the pan, a cooling rack or plate to put the blintzes on once they're cooked, and a paper towel or two to clean up the inevitable drips of batter.
1. Heat the pan over medium or medium-high heat, adding a little butter or oil to the pan before cooking the first blintz.
2. When the pan is warm, add about 2 tablespoons (1/8 cup; half of a 1/4 cup measurer) of blintz batter to the pan, then rotate the pan immediately to distribute the batter into a circle.
3. Once the top of the blintz is no longer liquid and shiny, and the underside is golden brown, slide the blintz out of the pan onto a waiting plate. Look the blintz over to see how it turned out, and adjust the cooking time and the stove's heat level based on this inspection (e.g., if the bottom is browning before the top is cooked, turn the heat down). I have an electric stove with only a few heat settings, so I often find myself switching between two heat levels on the stove to maintain the optimum cooking temperature.
4. Continue cooking (steps 2-3) until you've used all the batter (or made as many blintzes as you want to fill).

To fill the blintzes and cook them:
0. Preheat the oven to 350F.
1. Put an individual blintz on a plate, uncooked side up, and place approximately 1-2 tablespoons of filling onto the center of the blintz.
2. Fold one edge (the bottom) of the blintz up onto the filling, fold the two sides in, and then roll the filled portion of the blintz onto the last unfolded edge (the top). This should leave you with a compact packet of blintz neatly surrounding the cheese filling. Repeat for all the blintzes; see figure 1 for more detail.
3. Arrange all the filled blintzes on a baking sheet (we line ours with a non-stick liner, but this is probably not necessary) so that they're not touching, and bake at 350F for 17-20 minutes (or until the filling is heated through and the outside is crispy).
4. Let cool briefly, and serve.

Filling a blintz: part 1 Filling a blintz: part 2 Filling a blintz: part 3 Filling a blintz: part 4 Filling a blintz: part 5
Figure 1: How to fill a blintz.

Notes:

When I cook the blintzes I use two pans simultaneously and fill the cooked blintzes almost immediately after I've slid them out of the pan (as another pair cook in the pans). If you're a beginner at making blintzes, I'd recommend using just one pan and waiting to fill the blintzes until after you've cooked all the batter.

This recipe is based on one in Joy of Cooking (though we've changed the proportions to make the filling sweeter and have more filling for the blintzes). Joy of Cooking specifies that the filled blintzes should be fried in a few tablespoons of oil in a pan on the stove; while this does result in a slightly crispier outside, it's far more tedious than baking, and thus we usually bake ours.

As making crepes and blintzes is so similar, many of these instructions are copied directly from our crepes with a savory chicken and cheese sauce filling recipe. Note, however, that unlike crepes, blintzes are cooked on only one side before filling.

Reference:

Rombauer, I. S., M. R. Becker, and E. Becker. 1997. Joy of Cooking. Scribner, NY.

Wednesday, July 25, 2007

A few good links

Twisty, of I Blame the Patriarchy, talks about aggregating harvestmen.

Science Daily summarizes a psychology experiment wherein women who are told that there is a genetic explanation for women's lack of ability to do math perform worse on math tests than women who are told there is no difference between how men and women perform on math tests.
Between 2003 and 2006, Dar-Nimrod and Heine conducted their research with more than 220 female participants. Their study provided participants with bogus scientific explanations for alleged sex differences in math.

Some women received a genetic account of inborn traits to explain the difference while others received an experiential account -- such as math teachers treating boys preferentially during the first years of math education. Other participants were reminded of the stereotype about female math underachievement, or were told that there are no sex differences in math.

Heine and Dar-Nimrod found the worse math performances belonged to women who received a genetic explanation for female underachievement in math or those who were reminded of the stereotype about female math underachievement. Women who received the experiential explanation performed better -- on par with those who were led to believe there are no sex differences in math.
The Times Union posts a news story about airport screeners failing to detect bomb-making materials in carry on luggage (published July 4, 2007):
The unannounced inspection by TSA officials took place [at Albany International Airport] early last week. The airport's security measures failed in five of seven tests, most of the problems occurring at the passenger checkpoint, the sources said.

In one test, TSA inspectors hid the components of a fake bomb in carry-on luggage that also contained a bottle of water. Passengers are prohibited from carrying containers holding more than three ounces of liquids, gels or aerosols through airport checkpoints.

The screeners at Albany International confiscated the water bottle but missed the bomb. In all, the inspectors slipped four banned items through the main checkpoint during the test, sources said.

The New York Times has an article on how the ability of the Surgeon General to be an independent office is being compromised:
Former Surgeon General Richard H. Carmona told a Congressional panel Tuesday that top Bush administration officials repeatedly tried to weaken or suppress important public health reports because of political considerations.

The administration, Dr. Carmona said, would not allow him to speak or issue reports about stem cells, emergency contraception, sex education, or prison, mental and global health issues. Top officials delayed for years and tried to “water down” a landmark report on secondhand smoke, he said. Released last year, the report concluded that even brief exposure to cigarette smoke could cause immediate harm.

Dr. Carmona said he was ordered to mention President Bush three times on every page of his speeches. He also said he was asked to make speeches to support Republican political candidates and to attend political briefings.

And administration officials even discouraged him from attending the Special Olympics because, he said, of that charitable organization’s longtime ties to a “prominent family” that he refused to name.
The Independent has an article by a reporter who traveled on a cruise ship packed with readers of the National Review. Read it for a view into the mindset of a few American conservatives.

Tuesday, July 24, 2007

I can use the net again!

Shortly after my last post I did indeed go 'net silent' to avoid accidentally reading spoilers for Harry Potter. I'm happy to report that I have now finished the book without encountering a single spoiler.

It's so nice to be able to surf the web again. My apologies to anyone whose comments or e-mails I've ignored in the past few days.

Wednesday, July 18, 2007

Uh oh

We've pre-ordered the last Harry Potter book (Harry Potter and the Deathly Hallows), and like good geeks are re-reading the last few books to prepare ourselves for the big day on Saturday. In fact, to avoid spoilers we've both decided to stay off the net from the time the book is released until we've both read it. Unfortunately, it looks like we may have to avoid the net earlier than we had hoped, as BoingBoing reports1 that the book is now available on the web.

1 Note that BoingBoing's post may have spoilers in it; I stopped reading it as soon as I figured out what it was about.

[Update: Cory has commented that there are no actual spoilers in the BoingBoing post, so it's safe to read.]

A few updates

It's been a while since I posted, and thus I wanted to reassure folks that the slow posting is due to nothing more than being distracted with other items. On the list of (enjoyable) distractions are house-guests (which we'll have three sets of this month), guitar playing, birthday celebrating, and starting work on my new online course.

The guitar course has been going for a few weeks now, and I'm having a blast. The course is focused around playing classical guitar, which I'd never really listened to before this course, but am now finding that I quite enjoy (both playing and listening to). I've still got a long way to go before I can do much of anything with the instrument, but it's fun to plink away at it every night.

And, as is traditional, I cooked my SO a birthday feast on the big day. This year the feast consisted of cheese blintzes (which will likely be this week's end-of-the-week recipe blogging post), crab dip, chicken ravioli, and a white chocolate cake filled with lemon curd. Everything was homemade, including the ravioli:

Homemade ravioli

While the ravioli took hours to make (I remember now why we haven't made them for about three years), they were excellent with a sauce of nothing but butter and Romano cheese. My SO should have birthdays more often!

Monday, July 09, 2007

Teaching link: Wellcome Images

One of the problems of developing an online course (or an in-person course, for that matter) is finding good artwork. Sure, there are lots of images available on the web, but relatively few of these are completely legal to use (i.e., most are copyrighted works with no clear license to allow educators to use them). However, works licensed under Creative Commons licenses are freely usable by educators1, and thus I now attempt to use only Creative Commons licensed works when I develop teaching materials.

There are many places where you can find Creative Commons licensed materials (e.g., Flickr's advanced search lets you filter by license, and all PLOS journal articles are Creative Commons licensed), but BoingBoing just linked to an amazing resource: Wellcome Images. This website, run by the Wellcome Trust, contains images depicting "two thousand years of human culture," and everything on it has been released under a Creative Commons license2.
Wellcome Images is one of the world's richest and most unique collections, with themes ranging from medical and social history to contemporary healthcare and biomedical science.

All our images are available on demand in digital form. Search online or use the expertise of our professional scientific and historical researchers.

Whether it's medicine or magic, the sacred or the profane, science or satire - you'll find more than you expect.

This unrivalled collection contains historical images from the Wellcome Library collections, Tibetan Buddhist paintings, ancient Sanskrit manuscripts written on palm leaves, beautifully illuminated Persian books and much more.

The Biomedical Collection holds over 40 000 high-quality images from the clinical and biomedical sciences. Selected from the UK's leading teaching hospitals and research institutions, it covers disease, surgery, general healthcare, sciences from genetics to neuroscience including the full range of imaging techniques.
(quote from here)
I've only been browsing for a short while, but have already found a ton of images I think I'll use in my course. Who wouldn't want pictures of a malaria parasite in a mosquito's gut, an opium poppy, a human embryo implanting at 6 days, a picture of male bodybuilders pre-testosterone-injections, or drawings of morels? Go find some for yourself!

1 As long as the educators are creating non-commercial works, and even then some Creative Commons licenses allow commercial works.
2 All images are either under a Creative Commons Attribution, Non-commercial Licence 2.0 or a Creative Commons Attribution, Non-Commercial, No Derivatives 2.0 license.

Sunday, July 08, 2007

My new favorite band

Nunatak.

They were in Live Earth yesterday. Of course, they were playing from the British Antarctic Survey's Rothera Research Station, so there weren't too many people in the audience (17), but who wouldn't love a band made up of members like this:
  • Matt Balmer – electronics engineer with the physics and meteorology team.
  • Tris Thorne – communications engineer
  • Ali (Alison) Massey – marine biologist
  • Rob Webster – meteorologist
  • Roger Stilwell – Field General Assistant (polar guide)
Go watch the videos of their songs here, and then go read about the band here.

Update: They've got their songs posted on YouTube, so here's one to whet your appetite:

Thursday, July 05, 2007

Even limited exercise helps

One of the exercise mantras commonly floated about is that adults should get 30 minutes of moderate activity exercise at least five days a week. While this is a good goal, the majority of Americans don't get this amount of exercise1. And, for a lot of beginning exercisers, exercising for 30 minutes a day probably seems like a huge commitment, if not an insurmountable challenge.

My SO and I have long viewed exercise in the "some is better than none" category, and thus try to do even little amounts whenever we can (e.g., walking to the store instead of driving, always taking the stairs at work, doing our own gardening). A recent paper (Church et al., 2007) has shown, via a randomized, controlled trial, that even small amounts of exercise are better than no exercise at all (at least for the subset of people they tested).

Church et al. divided overweight, post-menopausal women into four groups:
  • Control: Did no exercise a week (other than normal walking)
  • 4kcal/kg: Exercised about 70 minutes a week
  • 8kcal/kg: Exercised about 135 minutes a week
  • 12 kcal/kg: Exercised about 190 minutes a week
Participants were randomly assigned to a condition, and all exercise was performed in a lab2. The participants exercised at their given level for six months, at which point physiological data were compared to data taken at the start of the study.

Fitness improvement correlated linearly with the amount of exercise:


Figure 3 from Church et al 2007
Figure 3 from Church et al. (2007)."Percent Change in Fitness Data for Each Study Group. The data represent the least-squares means adjusted for age, ethnicity/race, weight, and peak heart rate. The P values for pairwise comparisons of control with 4-kcal/kg, 8-kcal/kg, and 12-kcal/kg per week groups are P .001 for each variable. P for linear trend across groups .001 for each outcome. Error bars indicate 95% confidence intervals."

So, what this means is that even if you work out for only 20 minutes a day three days a week, you'll almost certainly see fitness benefits. And, once you start working out and getting used to doing it regularly, if you increase your workout durations (say, to 40 minutes a day three days a week), you'll see even more improvements. And, to help scare you into exercising, note that the people who didn't do any exercise actually had a small decrease in fitness3.

So, if you're one of the many sedentary Americans out there, take a look at those graphs and start exercising, even if it's only for a few minutes a day. It'll do ya good!

1 As in "More than 60 percent of U.S. adults do not engage in the recommended amount of activity (30 minutes a day, 5 days a week)" and "Approximately 25 percent of U.S. adults are not active at all." (data from the 1996 Surgeon General's Report on Physical Activity and Health, specifically from here)
2 "Women in the exercise groups alternated training sessions on semi-recumbent cycle ergometers and treadmills." The control (non-exercising) women tracked their daily steps with a pedometer and were "asked to maintain their level of activity during the 6-month study period."
3 In fact, it was the realization that our fitness was slowly declining (and would continue declining until we would no longer be able to walk when we were 70) that finally motivated my SO and me to start regularly exercising (and tracking our exercise goals and progress here) a few years ago.

Church, TS., DP Earnest, JS Skinner, and SN Blair. 2007. Effects of Different Doses of Physical Activity on Cardiorespiratory Fitness Among Sedentary, Overweight or Obese Postmenopausal Women With Elevated Blood Pressure. JAMA. 297:2081-2091. Abstract.

Justice for all

In case you hadn't heard, Scooter Libby's 30-month prison sentence was commuted on Monday by President Bush. The reason, according to the president, is that "the prison sentence given to Mr. Libby is excessive." The LA Times begs to disagree:
But records show that the Justice Department under the Bush administration frequently has sought sentences that are as long, or longer, in cases similar to Libby's. Three-fourths of the 198 defendants sentenced in federal court last year for obstruction of justice — one of four crimes Libby was found guilty of in March — got some prison time. According to federal data, the average sentence defendants received for that charge alone was 70 months.
And the New York Times cites a similar case where clemency hasn't been granted:
Similarly, in a case decided two weeks ago by the United States Supreme Court and widely discussed by legal specialists in light of the Libby case, the Justice Department persuaded the court to affirm the 33-month sentence of a defendant whose case closely resembled that against Mr. Libby. The defendant, Victor A. Rita, was, like Mr. Libby, convicted of perjury, making false statements to federal agents and obstruction of justice. Mr. Rita has performed extensive government service, just as Mr. Libby has. Mr. Rita served in the armed forces for more than 25 years, receiving 35 commendations, awards and medals. Like Mr. Libby, Mr. Rita had no criminal history for purposes of the federal sentencing guidelines.

The judges who sentenced the two men increased their sentences by taking account of the crimes about which they lied. Mr. Rita’s perjury concerned what the court called “a possible violation of a machine-gun registration law”; Mr. Libby’s of a possible violation of a federal law making it a crime to disclose the identities of undercover intelligence agents in some circumstances.

When Mr. Rita argued that his 33-month sentence had failed to consider his history and circumstances adequately, the Justice Department strenuously disagreed.
Ugh.

Friday, June 29, 2007

Caesar salad

My SO and I have loved Caesar salads for a long time, and thus many years ago we made our own home-made Caesar salad following Joy of Cooking's recipe. While the dressing is quite simple, we ran into a problem: it had too much raw garlic. As you may know (if you've read many of our other recipes), we're not ones to shy away from garlic, but raw garlic can be extremely sharp, and thus a few of our early batches of dressing were too sharp to thoroughly enjoy. However, by reducing the amount of raw garlic added, and replacing it with garlic that's been simmered in oil, we've been able to keep a strong garlic flavor without risking sharpness. If you've never had a homemade (or fancy restaurant) Caesar salad, the flavor (and lack of creamy white goo) may surprise you.

This recipe includes homemade croutons, which provide extra garlic for the dressing and are tastier than typical store-bought ones, but feel free to use pre-made ones if you're in a hurry (as the rest of the salad is quick and easy to make). Since we just had this for dinner a few days ago, it's this week's end-of-the-week recipe blogging post.

For the croutons:
6 cloves garlic, thinly sliced
3 tablespoons butter
4 tablespoons olive oil
5 cups of ~1/2" cubes of bread (we often use whole-wheat sandwich bread, just because we have it around, but a good hearty bread like ciabatta is best)
1/2 teaspoon kosher salt
1/4 teaspoon ground black pepper

For the dressing:
Reserved garlic from the croutons
1 medium clove garlic, finely minced or pressed with a garlic press
1/4 teaspoon ground black pepper
1 tablespoon fresh lemon juice
1 teaspoon Worcestershire sauce
2 teaspoons fish sauce (the Thai ingredient) or 2-4 mashed anchovies with a pinch of salt
1/2 cup extra virgin olive oil
2 whole eggs, raw or simmered for a minute or two (see notes)

For the salad:
Romaine lettuce (or whatever greens you'd like)
Grated, shredded, or shaved Parmesan or Pecorino Romano cheese

To make the croutons:
0. Preheat your oven to 350F.
1. Heat the olive oil and butter in a frying pan over medium heat.
2. Once the oil is hot, add the garlic and heat long enough for the garlic to start bubbling (the garlic should not brown). Remove from the heat and let sit for 10 minutes.
3. Strain the garlic from the oil, saving both the garlic and the oil. The oil will be used to season the croutons, and the garlic will be added to the dressing.
4. Put the bread cubes into a large bowl, sprinkle with salt and pepper, and pour the garlic oil over them. Toss to distribute the oil, salt, and pepper, and then put into a rimmed baking sheet large enough to hold all the bread in a single layer.
5. Bake for ~12-20 minutes at 350F, or until the bread is golden brown, stirring every 4 minutes.
6. Set aside until ready to serve.

To make the dressing:
1. Add the reserved garlic from the crouton making (mash it into a paste, if desired), raw garlic, pepper, lemon juice, Worcestershire sauce, and fish sauce or anchovies to a salad dressing shaker (or bowl) and mix well.
2. Add the olive oil and mix until emulsified. If you're using a salad dressing shaker you can add all the oil at once and then shake vigorously until well mixed; if you're using a bowl, add the olive oil in a slow, steady stream while you whisk constantly.
3. Add the eggs, and mix well.
4. Refrigerate until ready to use.

To assemble the salad:
1. Wash the lettuce or other greens, spin (or shake) them dry, and tear or cut into bite-sized pieces.
2. Put the greens into a bowl and top with dressing, cheese, and croutons.

Notes:

Aficionados of Caesar salads will note that fish sauce isn't a typical ingredient. We use it because we rarely have anchovies on hand, but we always have fish sauce. Since fish sauce is, well, fish flavored, adding a bit of it imparts the same fishy undertone that anchovies do. So, if you have anchovies on hand, by all means use them, but if you're out of anchovies feel free to use fish sauce.

Raw eggs are a standard addition to Caesar salad dressings, but they do have the potential to carry pathogens. One way to mitigate the danger of the raw eggs is to simmer them in water for a minute or two, but this does not remove all the risk. While we're willing to accept the risk of eating raw eggs, you may not be, in which case we'd advise using another recipe, as we know of no good substitution.

In a classic Caesar salad, the eggs are added to the salad separately from the dressing. This makes dressing the salad more tedious, however, and thus we prefer mixing the eggs directly into the dressing.

This makes about 1 cup of dressing. We find this is usually enough for four large (entree-sized) bowls of salad; ditto for the amount of croutons (unless you, like us, can't resist eating them, in which case this will make enough croutons for two large bowls of salad and a bit of snacking).

Reference:

Rombauer, I. S., M. R. Becker, and E. Becker. 1997. Joy of Cooking. Scribner, NY.

[Updated November 2007 to clarify the garlic cooking instructions and change where the salt and pepper were added to the croutons.]

Ordering glasses online

My SO and I just went in for our annual eye checkups, and it's finally time for both of us to replace our several-year-old glasses. As usual, after the checkup we were directed to the eyeglass sales area of the store, and a sales rep came out to help us pick out frames. We both tried on a number of frames, and selected a few to price out. The cheapest frame I had chosen was $200 after insurance, and the most expensive was more than $500 after insurance. Lenses would have cost about $100 extra. My SO's potential frames were in the same price range, but would have had even more expensive lenses. All told, we probably would have spent more than $1,000 buying new glasses at the optometrist.

Thankfully, we knew that we could find a better deal, as a while ago I found Glassy Eyes, a blog about ordering glasses online. While ordering glasses online is a bit harder than ordering them in person (you must enter your prescription manually, know your interpupillary distance1, and analyze the frame sizes to see how they'll fit on your face), the price difference was astounding: there are multiple websites where you can find quite decent looking glasses for less than $40 a pair, including lenses.

So, rather than spending $1,000 at our local optometrist, my SO and I just ordered a new pair of glasses for each of us from Optical4Less, spending less than $100 total. While I'm willing to pay for the extra service an optometrist provides, and the convenience of a local store, said conveniences are not worth a ten-fold increase in price.

If these glasses turn out to be good, I think we're going to go on a glasses-buying binge.

1 While you can measure interpupillary distance with a ruler, we did it using a binocular compound microscope with adjustable-width eyepieces.

Thursday, June 21, 2007

A few remodeling links

How to caulk around a shower - my SO and I used this as a guide for caulking our bathroom floor.

Suggested order for painting a house - A discussion board thread with a recommendation for the order of painting a house (and any room in it; we used this to guide our painting in the bathroom)

Installing interior moldings - While we have a detailed book on this topic (Finish Carpentry by Gary Katz), it was nice to have another illustrated source.

How To Install Baseboard Molding, Even On Crooked Walls - Tips to resolve a few common molding installation problems.

The Finish Carpenter's Manual by Jim Tolpin - A book with sample pages available via Google Books, one of which (page 104) just happened to succinctly summarize how to scribe baseboard molding. Based on the preview, this looks like a great book on finish carpentry.

Casing Problems - Drywall Not Flush With Jamb - Not that we're saying that this happened in our house (after all, our remodeling has gone so smoothly!1), but this is an illustrated example of how we would have dealt with drywall that ended up being proud of the door jamb if it had occurred.

This Old House video on installing crown molding - The text on the page is a bit more useful than the video, though it was nice to see someone actually installing it (rather than just reading about it)

1 And if you believe that, just go read some of the posts linked to here; then you can come and tell me if I'm being sarcastic or not.

Wednesday, June 20, 2007

A big day for Radagast and SO

You may recall that my SO and I have been remodeling our house; the primary motivation for this was finding water damage (and resultant mold growth) in both bathrooms when we bought the place.

While our bathroom remodeling predates this blog, we've written about a lot of it here. To summarize, we ripped everything out to the studs, replaced all the plumbing (both supply and waste), installed new windows, redid the drywall, painted, and spent forever working on the floor. While both bathrooms were ripped out to the studs way back when, we've focused most of our energy on trying to finish the master bathroom, which (embarrassingly) we've hoped to do since 2004.

It is thus with great excitement that I'm able to report a major accomplishment: we now have a functioning toilet, sink, and shower in our master bathroom. While the room is not entirely finished yet (we need to finish the moldings, paint the door, and do a few other small tasks), everything that counts is in.

Yippee!

Now I just need to come up with more excuses to go in there and admire it.

Monday, June 18, 2007

Basic cheese sauce

Some of my fondest childhood memories are eating my mom's steamed cauliflower slathered with cheese sauce after returning from trips1. What follows is the Radagast and SO household standard cheese sauce recipe; while this isn't the fanciest cheese sauce, it's easy to make, reminds me of my mom's, and tastes, well, cheesy. Since we had cauliflower with cheese sauce last week, this is this week's end-of-the-week recipe blogging post.

1/4 cup (4 tablespoons) unsalted butter
1/4 cup (4 tablespoons) flour
2 cups milk
2 cups grated cheddar cheese (we use medium cheddar)
1/2 teaspoon kosher salt
1/4 teaspoon ground black pepper

0. Heat the milk in the microwave (or in a small saucepan over medium heat), but do not bring it to a boil.
1. Melt the butter in a non-stick saucepan over medium-high heat.
2. Add the flour, and, stirring constantly, cook until the flour browns slightly (probably around 3 minutes).
3. Remove the pan from the heat and let cool, stirring frequently, until the flour mixture stops bubbling.
4. Add the warmed milk to the flour mixture, return to the heat, and whisk constantly until smooth.
5. Cook, whisking frequently, until the sauce is somewhat thickened (probably about 5 minutes).
6. Add the cheese (adding it in two batches helps keep it from forming a giant, slow-to-dissolve blob) and stir until all the cheese is melted.
7. Add the black pepper and salt; taste, and adjust the seasonings to your liking.

Notes:

If you like nutmeg (which Radagast doesn't), a pinch or two might compliment the sauce's flavor.

This sauce should be served warm, as it thickens when it cools. A skin may form on the surface of the sauce if it sits for a while at room temperature; just stir this skin back into the sauce and it will be fine. If the mixture begins to thicken too much before you're ready to eat it, simply re-heat it on the stove (or in the microwave) briefly, stirring frequently.

1 I still love cheese sauce on cauliflower, though these days I typically use roasted cauliflower as the base, not steamed.

Saturday, June 16, 2007

Roger Waters live


Originally uploaded by DaigoOliva

[Spoiler warning: This post includes details about Roger Waters' 2007 tour]

My SO and I don't go to many concerts, but this week we went to see Roger Waters (of Pink Floyd fame). The tour advertised that he would be playing the entirety of Dark Side of the Moon, but he also played a great assortment of his other work1 (list from here):
  • In The Flesh
  • Mother
  • Set The Controls For The Heart Of The Sun
  • Shine On You Crazy Diamond
  • Have A Cigar
  • Wish You Were Here
  • Southampton Dock,
  • Fletcher Memorial Home
  • Perfect Sense Parts 1 & 2
  • Leaving Beirut
  • Sheep
  • The Happiest Days of Our Lives
  • Another Brick In The Wall Pt. 2
  • Vera
  • Bring The Boys Back Home
  • Comfortably Numb
While our seats weren't terribly close to the stage, the venue had continuous video footage broadcast on large screens. Much of this video footage focused on the guitarists' hands, which I was appreciative of thanks to my newfound hobby of playing the guitar2.

As one might guess, Roger has little love for George W. Bush, and thus included many jabs at him. His new song Leaving Beirut had a graphic-novel-style background including the lyrics, which included this bit:


Roger Waters_Leaving Beirut - Oh George! Oh George!
Originally uploaded by Garry'


Oh George! Oh George!
Originally uploaded by Garry'

He also had a floating pig covered in graffiti:


A Pig never lies
Originally uploaded by Ronaniversario

While our pig didn't look exactly like the one pictured above (after browsing Flickr it appears that a new pig is made for each show), the writing on our pig included such statements as "Torture shames us all," "All religions divide," "Impeach Bush," "What an asshole [with an arrow pointing to "Bush"]," "Fear builds walls," and "Habeas corpus matters."

My favorite was the addition of a quote from Bush in the background visuals for The Fletcher Memorial Home:


Fletcher Memorial Home
Originally uploaded by EddieBerman

Ignoring all the traffic getting to and from the concert, it was a great evening of prog rock. Up next: Genesis.

1 I was probably one of the few fans in the audience who was sad that most of his solo work was left out.
2 Methinks it will be a very, very long time before I'm able to come anywhere close to playing songs like them.

[Note: All images in this post are Creative Commons licensed.]