Showing posts with label photo. Show all posts

Monday, July 09, 2007

Teaching link: Wellcome Images

One of the problems of developing an online course (or an in-person course, for that matter) is finding good artwork. Sure, there are lots of images available on the web, but relatively few of these are completely legal to use (i.e., most are copyrighted works with no clear license to allow educators to use them). However, works licensed under Creative Commons licenses are freely usable by educators1, and thus I now attempt to use only Creative Commons licensed works when I develop teaching materials.

There are many places where you can find Creative Commons licensed materials (e.g., Flickr's advanced search lets you filter by license, and all PLOS journal articles are Creative Commons licensed), but BoingBoing just linked to an amazing resource: Wellcome Images. This website, run by the Wellcome Trust, contains images depicting "two thousand years of human culture," and everything on it has been released under a Creative Commons license2.
Wellcome Images is one of the world's richest and most unique collections, with themes ranging from medical and social history to contemporary healthcare and biomedical science.

All our images are available on demand in digital form. Search online or use the expertise of our professional scientific and historical researchers.

Whether it's medicine or magic, the sacred or the profane, science or satire - you'll find more than you expect.

This unrivalled collection contains historical images from the Wellcome Library collections, Tibetan Buddhist paintings, ancient Sanskrit manuscripts written on palm leaves, beautifully illuminated Persian books and much more.

The Biomedical Collection holds over 40 000 high-quality images from the clinical and biomedical sciences. Selected from the UK's leading teaching hospitals and research institutions, it covers disease, surgery, general healthcare, sciences from genetics to neuroscience including the full range of imaging techniques.
(quote from here)
I've only been browsing for a short while, but have already found a ton of images I think I'll use in my course. Who wouldn't want pictures of a malaria parasite in a mosquito's gut, an opium poppy, a human embryo implanting at 6 days, a picture of male bodybuilders pre-testosterone-injections, or drawings of morels? Go find some for yourself!

1 As long as the educators are creating non-commercial works, and even then some Creative Commons licenses allow commercial works.
2 All images are either under a Creative Commons Attribution, Non-commercial Licence 2.0 or a Creative Commons Attribution, Non-Commercial, No Derivatives 2.0 license.

Sunday, May 06, 2007

Flower pictures!

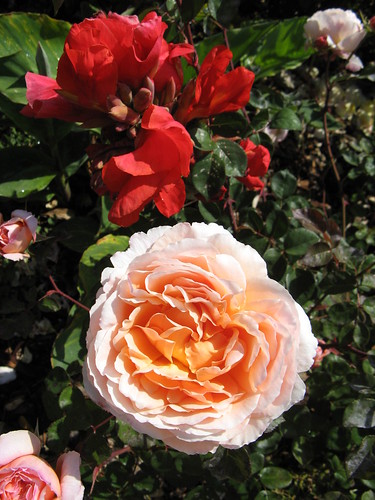
While this time of year is filled with stress, it's nice to be able to spend some time working in the yard seeing things like this:

English rose and a canna
A canna and an English rose.

Of course, if one was to look at my past garden pictures, one might think that I only take pictures of roses. To help counter that, here's what our calla lillies look like right now:

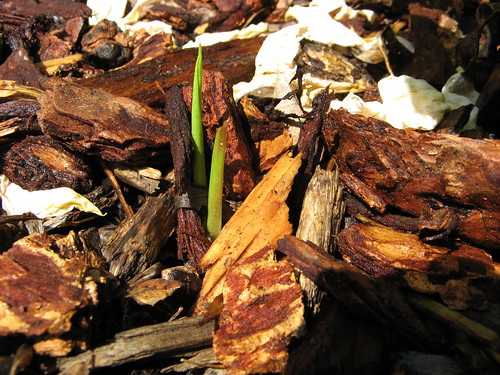
Calla lilly emerging

These die back to their rhizomes every fall, and I love seeing them pop out of the soil in the spring.

Thursday, April 12, 2007

Corals on dry land

National Geographic has pictures from an island in the South Pacific whose elevation was increased 10 feet by a recent earthquake. This probably won't harm the terrestrial organisms too much, but has wreaked havoc with the sub-tidal organisms, as many of the large sessile ones (e.g., corals) are now poking up out of the water. Poor corals. (Via BoingBoing)

Friday, March 16, 2007

New Orleans highlight: food

You all know me well enough to know that food is something I love, and thus I had to seek out good food in New Orleans (thankfully it was not hard to find). And, of course, I had to get pictures of the food to share here.

The first great food I had was at the Commander's Palace, which I've already posted about.

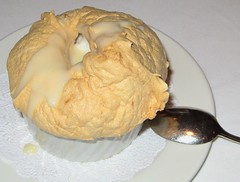
Turtle soup Gulf fish
Bread pudding soufflee Commander's Palace kitchen
Turtle soup, gulf fish, souffle bread pudding, and the kitchen where it was all made.


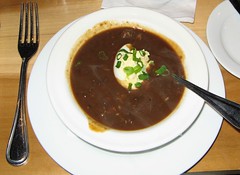
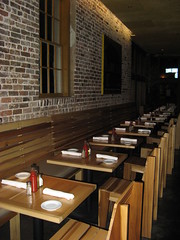
The next good dinner I ate was at Cochon; I had andouille & sweet potatoes with a black-eyed pea vinaigrette, crab gumbo with a deviled egg, and louisiana cochon with turnips, cabbage and cracklins. Everything was delicious (especially the gumbo; it rivaled the Commander's Palace's turtle soup), but sadly only the crab gumbo picture is worth posting:

Crab gumbo with a deviled egg Cochon in New Orleans
Crab gumbo with a deviled egg, and Cochon.

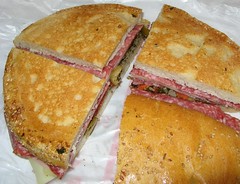
On my final day in town, thanks to a recommendation by doctorj, I headed off to Central Grocery and got myself a muffuletta; it was most excellent. It was big enough that I even brought some back for my SO (some people bring back flowers, t-shirts, or artwork; I bring back half-eaten sandwiches).

Central Grocery sign Muffuletta
A muffuletta

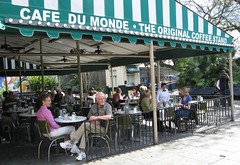
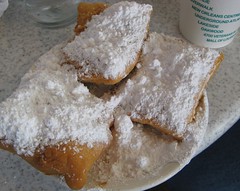
And, since Cafe du Monde was just down the block from Central Grocery, I took ArtK's advice and headed over there to have some beignets for dessert after my muffuletta:

Cafe du Monde Beignets

Just looking at these pictures again makes me hungry.

I now feel a great need to return to New Orleans to try out all the food I missed (and get more of everything I had).

Saturday, March 10, 2007

New Orleans highlight: books

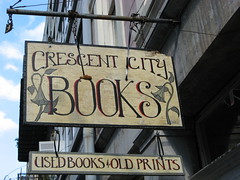
While wandering around New Orleans last week, I came across a sign that I could not resist:

Bookstore sign

Crescent City Books is a used bookstore in the French Quarter (204 Chartres St., New Orleans). Every nook and cranny (and much of the floor) is stuffed full of books:

A good place to read

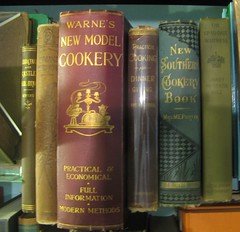
The store has the perfect ambiance for browsing used books (including couches to read on!), and is extremely well organized. If I hadn't been attending a conference and short on time, I could have spent hours upon hours in there. As it was, I spent more than half an hour reading through some old cookbooks they had in a case up front:

Old cookbooks at Crescent City Books

Most of those cookbooks date to the late 1800's (the one by Warne is the newest of the bunch, and it dated to the 1930's if I recall correctly). Many of them had notes scribbled next to the recipes, and still had little splatters of grease on certain pages. If they hadn't cost more than $100 each (one was priced at $400!), I would have left with at least one.

Thursday, February 22, 2007

Teaching link - baby mouse development

I'm insanely busy this week coordinating a visit by multiple out-of-state advisers for one of our programs1, but my SO found something that made me smile amidst the mountains of work: a series of daily pictures of mouse development. If you want to talk about mouse development post-birth, or need illustrations for what mice look like at various ages (from 1 - 28 days), this would be a great resource.

And, if you absolutely must see more pictures of mice, go take a look at my pictures of baby mice and adult mice.

1 Yet again I'm swamped with work, and yet again it's unrelated to my classroom teaching. One of these semesters I've got to learn to say no to anything unrelated to the classroom so I can actually have time to work on improving my teaching ...

Friday, July 07, 2006

Bulk resizing and renaming images in Ubuntu - The Resize_images Nautilus script

I take a lot of pictures, and thus image manipulation is one of the more frequent tasks I do on a computer (though I'm by no means a pro). Since I'm in the process of switching to using Ubuntu, in the past few days I've been learning how Ubuntu handles images.

Importing images from my camera has been easy (as soon as my camera is plugged into a USB port, a dialog box pops up asking me what I want to do); previewing, rotating, and moving images is extremely easy to do via gThumb; and advanced image editing can be done via GIMP (which is similar in complexity to Photoshop). However, one thing that hasn't been easy is figuring out how to resize lots of images at once.

When resizing images for the web I usually create a thumbnail (~200 pixels high or wide) and a larger image (~600 pixels high or wide). To make file management easier I typically append the image's size to the file name. So, for instance, picture.jpg would become picture_200.jpg (a 200-pixel wide or high thumbnail) and picture_600.jpg (a 600-pixel wide or high image). This can be relatively tedious to do in most programs, especially with large numbers of images.

GIMP can handle scripts and plugins, but a quick look through their repositories didn't find anything that looked right (note: I probably missed something), and gThumb doesn't have a bulk resizing feature at all. ImageMagick is a (very powerful) command-line based program that can handle many images at once, and many people have written command-line-based scripts that make ImageMagick easier to use (the most versatile of which is bbips). However, all the scripts I initially found needed to be run from the command line, and none of them would rename the files as I desired.

Then I found G-script, a website that distributes scripts designed to integrate directly with GNOME (Ubuntu's graphical interface, equivalent to Windows) or Nautilus (Gnome's file manager, equivalent to Windows Explorer). G-script's multimedia category featured a script (NIS) that would resize images from within Nautilus. I installed it1, but quickly found that it wasn't quite what I was looking for; while it did have a graphical interface, it didn't have enough resizing options (only had maximum dimension lengths of 160, 320, 640, 800, and 1024 pixels), and while it did move the resized files into a new directory, it didn't rename the files.

In Windows I probably would have been out of luck, but since this is Linux and the script was contained in a text file (and licensed under the GNU GPL), I could freely modify it. So, last night I set about learning the basics of modifying a shell script, and eventually created a script that did everything I wanted.

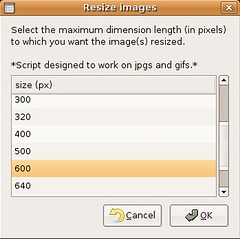
The new script ("Resize_images"; download it here3) is run as a Nautilus script; once it's installed1 all you have to do is select an image (or multiple images) in the file browser, select the script (by right clicking on the images and looking under the scripts menu), and the script does the following things:
  • Presents the user with a list of maximum dimensions2 (e.g., 1024, 800, 600, 400 pixels) that images can be resized to. Images will be resized so that their longest dimension is set at this value; the image's other dimension will be scaled appropriately (with a pre-set quality of 80).
  • Resize (theoretically) as many jpgs and gifs as can be selected in Nautilus at once.
  • Puts all resized images into a subdirectory named "resized_to_xxx" (where xxx is the maximum dimension that was selected).
  • Appends the selected maximum dimension to the filename of resized images. So, if images are resized to a maximum dimension of 600 pixels, "caterpillar.jpg" becomes "caterpillar_600.jpg" and "cute_rat_yawn.JPG" becomes "cute_rat_yawn_600.JPG".
  • The script does not modify the original images in any way.

Resize_images script dialog
The primary dialog of the Resize_images script.

[Downloaded the script here3.]

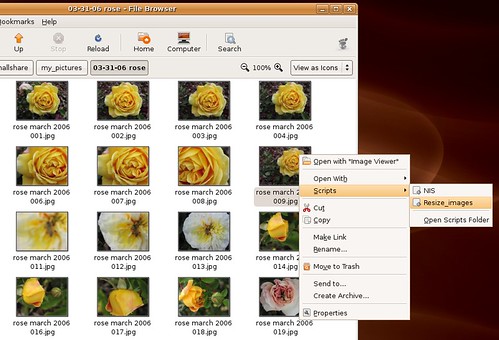
The script is run from Nautilus (Ubuntu's basic file browser), so to resize images all I have to do is find them with the file browser, select them, and execute the script (which only requires right-clicking on the image(s) and selecting the script from the "Scripts" menu that appears). That's it. I can now resize dozens of images with just three clicks of the mouse (assuming the images are already selected); I don't have to open Photoshop, GIMP, or any other program.

Resize_photos script in Ubuntu
Choosing the Resize_images script from within Nautilus (Ubuntu's file browser) by right-clicking on the image.

This is a great example of the power of open-source (and easily scriptable) operating systems. I had a specific task I wanted to carry out, but even though I couldn't find a pre-written program to perform that task, I found something that did most of what I wanted and then just modified it to make it "perfect." And, since everything is open-source, now I can share my completed script so that others who want to do the same thing can do it more easily, and also so that others can improve upon what I've done (something that's desperately needed, I'm sure).

Notes:

1 To install the script you must first save it to a file, make it executable ("chmod u+x Resize_images"), and then copy it to your Nautilus scripts folder (~/.gnome2/nautilus-scripts). At that point it should be visible in Nautilus when you right click on an item and select "Scripts". The script does require ImageMagick, zenity, and rename to run, but all of these are installable on Ubuntu (and zenity and rename should be installed by default).
2 The list of maximum dimensions can be customized by editing the script file - as many (or as few) options as the user wants can be included, and they can be listed in whatever order the user desires.
3 Keep in mind that I'm a complete novice at scripting, so use at your own risk. I'd suggest testing this on copies of images before trying it on originals. If anyone has improvements to the script, I'd love to see them.


[Updated July 15, 2006 to add screenshots of the script.]

[February 19, 2007 - Updated the script (to v0.75) to support Edgy; many thanks to Dave for finding the required fix. The links in the post now point to v0.75, and a tar.gz of v0.75 can be found here. Version 0.7 can be found here.]
Categories:

Wednesday, August 25, 2004

How I fell for Niagara, part 2

And now for the second of my two posts on Niagara Falls (the first post is here):

Lewiston and 18F:

On Saturday we traveled north from Niagara Falls, heading for Old Fort Niagara, and stopped along the way in Lewiston for lunch. Lewiston has a main street a few blocks long, lined with shops and restaurants; the picture below was taken on Saturday afternoon:

Niagara Falls area - Lewistown main street

After lunch and a bit of shopping (including a visit to a bookstore that had fewer books on display than I have in my house) we headed north to Old Fort Niagara. We took 18F, instead of the Parkway, and were glad we did. 18F starts in Lewiston, and for most of its length is a two-lane road lined with classic northeast-style houses and lush, green foliage. The road travels along the shores of the Niagara River, so we got river vistas every now and then. There weren't a lot of cars or tourists around, which made the drive and the towns even more appealing.

Niagara Falls area - 18F
The picture above was taken along 18F, between Lewiston and Youngstown.

This leads to my second recommendation for the Niagara Falls area: if you want to do something different, look for a good bed and breakfast or small hotel near either Lewiston or Youngstown. Both are small towns that seem like they'd be nice to spend a relaxing weekend in, yet are close enough to Niagara Falls that you could drive there in less than 20 minutes. Note, of course, that I didn't stay in either town, so you may want to take this recommendation with a very large grain of salt.

A highlight on the drive north from Niagara Falls was Whirlpool State Park, which overlooks a region of the Niagara River where the water flows in a circle: for half the width of the river the water actually flows upstream. This park was nearly empty when we were there, but was definitely worth the visit. Below you can see a view from Whirlpool State Park, looking up the Niagara River towards the falls.

Niagara Falls area - view from Whirlpool State park

Old Fort Niagara and the Ft. Niagara Lighthouse

Old Fort Niagara is on the shores of Lake Ontario and was originally started by the French in the late 1600s. The earliest outposts were abandoned until 1726, when the French built a large "castle" on the site. The fort changed hands to the British in 1759 (where it served as a British fort during the Revolutionary War), was transferred to the US in 1796, was taken by the British again in the War of 1812, and was finally given back to the US at the end of the War of 1812.

Old Fort Niagara front

What is fascinating about this fort is that you can get a taste of what military life was like during three different periods of life in North America. The French castle and dirt walls on the site were built around 1726, the redoubts (towers) and many other buildings were built by the British during their first occupation (fortifying in anticipation of an American revolutionary assault), and the Americans modified it again during the Civil War. Thus in this one fort you can explore early French colonial architecture, British colonial military architecture, and American Civil War military architecture. It's a fascinating exercise in exploring the effect of technological development on military construction, and is a marvelous location for D&D players to see a real-life counterpart of their gaming worlds.

Niagara Falls area - Old Fort Niagara Lighthouse

Just outside the fort is the Fort Niagara Lighthouse, built in 1871. The lighthouse doors were open when we drove up, and we discovered that they were leading guided tours to the top of the lighthouse. I signed up (it was free, but I had to sign a waiver) and then climbed more than 70 steep, narrow stairs to the top of the lighthouse. The lighthouse was missing its lens, but the view from the top was extraordinary, and it was thrilling to be able to climb up an actual lighthouse staircase (I've always loved to look at lighthouses, but had never been able to climb up one before). To give you an example of just how steep and narrow the stairs were, here's a picture of the stairs leading down from the top, with one of my fellow adventurers attempting to get through the tiny door:

Niagara Falls area - Old Fort Niagara Lighthouse door down Niagara Falls area - Old Fort Niagara Lighthouse stairs

This thus leads to my third recommendation for the Niagara Falls area: if you have an extra afternoon while you're in the area, a trip to Old Fort Niagara is well worth the time, and if the Fort Niagara Lighthouse is open while you're there, take a few moments and climb to the top. Both were well worth it, and were definitely highlights of my trip.

Sunday, August 22, 2004

How I fell for Niagara, part 1

While deciding where to drive on our recent cross-country trip, my mom pointed out that Niagara Falls was only a few miles away from I-90 in New York, the route we'd be taking to Albany. Since I had never been to Niagara Falls, and my mom hadn't been there for decades, we decided to stay in the town for two nights.

Niagara Falls is a large waterfall on the Niagara River, near Buffalo, New York. The river connects Lake Erie and Lake Ontario, and also serves as the border between the United States (on the eastern shore) and Canada (on the western shore). The falls are visible from both countries.

My mom had never been to the Canadian side of the falls before, and we considered heading into Canada to see them from that side. In the end we decided that traveling across international borders with a car full of my mom's household possessions was probably asking for trouble, so we stayed on the New York side the entire time.

Niagara Falls, the city:


Before arriving in Niagara Falls, I imagined that the city was probably a moderately sized thriving tourist town, full of tree-lined streets, and cute shops, much like Victoria, B.C., which I had visited earlier in the summer. Instead, the town seemed like it was relatively economically depressed, which was sad since the area clearly brings in tons of tourists.

Our five-story hotel was a few blocks from Niagara Falls State Park, in a reasonably nice area that looked like it was probably built up in the 1960's. The hotel's thin walls let us hear the neighboring room's kids until 2am, and it only had one small elevator and two stairways to service its five stories. The area directly around our hotel was filled with other hotels and a few small restaurants, but very few stores. I had hoped to find a nice coffee shop to sit and read in, but didn't see any near the hotel.

After unloading the car we set out to find a restaurant and a bookstore. Along the way we ran into two closed roads (and the next morning found a third). The roads were just blocked off with "Road Closed" signs, and did not have detour signs or any notice about when they'd be reopened.

Niagara Falls road closed

This leads to my first recommendation for anyone traveling to Niagara Falls, NY: bring an excellent quality map of the downtown area. The AAA Buffalo map has a good map of downtown Niagara Falls, but don't rely on the AAA New York state map, it's far from adequate.

The shopping areas of downtown Niagara Falls looked like they had once been quite nice, but many stores seemed like they hadn't been renovated in years, there was almost no foot traffic along the streets, and scattered shops were even boarded up.

Niagara Falls store

Little Italy, a region of downtown Niagara Falls, showed scattered signs of its Italian heritage (Gianni's restaurant, Di Camillo bakery), but was virtually empty on the Friday evening we were there. Near Little Italy we found an excellent Italian restaurant, Fortuna's (827 19th, in Niagara Falls, NY), that seems to date back to the days when Little Italy was thriving. The restaurant was populated mainly with locals, had excellent food, and as we ate at least four parties being shown to tables stopped and greeted other patrons of the restaurant.

We never did find a bookstore.

Niagara Falls State Park:

I got my first view of the falls as night was falling on Friday evening; they were massive and awe-inspiring. What surprised me was that instead of being at the bottom of the falls, the viewing areas are up at the top, so I could walk right up to the edge and watch the water roll over.

What was interesting that first night was the contrast between the American and the Canadian sides of the falls. Niagara Falls, Ontario is visible across the river from the New York side, and the Canadian town looks as though it's pulsating with life. There are at least 10 high-rise hotels (whereas there are no high-rise hotels on the US side), wide boulevards filled with light and flashing signs, and restaurants seemingly everywhere (and, in our imaginations, a bookstore on every corner).

Niagara Falls at night, white Niagara Falls at night, colored

Niagara Falls State Park is a huge park with exquisitely maintained facilities. It was a wonderful place to explore the falls from, and is a must-see if you're visiting the area. One of my favorite places was Goat Island, an island in the middle of the Niagara river; we drove onto the island and were able to get extremely close-up views of the falls.

Here are a few more pictures of the falls, including a picture of the very edge, which I was only a few feet away from at the time (in the edge picture you can also see a "Maid of the Mist" boat at the bottom of the falls).

Niagara Falls rolling water Niagara Falls edge with boat visible

As expected, there were a tremendous number of tourists from all over the world visiting the park, which made it a great place to sit and people-watch. This gentleman in his saffron-colored clothes caught my eye:

Niagara Falls area - gentleman with saffron robes taking a picture


Here ends part one of my two-part Niagara Falls post. Be sure to stay tuned for the second (and final) installment, wherein I tour more of the Niagara Falls area, including an eighteenth-century fort and a nineteenth-century lighthouse.

[Update 8/25/04: The second installment has been posted.]

Tuesday, June 08, 2004

Yard update and chlorophyll synthesis

Yesterday my SO and I finally finished work on our newly created planting bed. We'd planted roses and bulbs earlier, but to finish up we added some edging, put in a new watering timer, and spread out some mulch. The bed is really nice now, but it doesn't look like we've put nearly the amount of time and sweat into it that we have.

We have been pleasantly surprised by the plants' progress, as we found our first rose flower bud and amaryllis flower bud coming up yesterday. Of course we promptly cut off the rose buds after taking a picture because the plants are far too young to be doing that sort of thing.

amaryllis rose flower bud


Those with good memories will remember that we only planted the bulbs a few days ago, and will probably wonder how the amaryllis was able to grow so fast. We'd been storing the bulbs in a cool, dark closet, and the amaryllis had started sending out leaves in the closet before planting day. The amaryllis leaves were pure white when we planted them; there wasn't even a hint of green in them. Then, the next day we could see hints of red and green in the leaves, and on the second day after planting the leaves were solid green.

This color change occurred because light is a critical component for the reactions involved in chlorophyll synthesis. In the absence of light plants will synthesize precursors of chlorophyll, but they cannot make the actual molecule. Thus, when the amaryllis was growing in the dark closet its leaves were filled with precursors of chlorophyll, but it couldn't turn those precursors into chlorophyll because there was no light. When we planted the bulbs light became available and the leaves were finally able to synthesize chlorophyll.

I apologize for not having the names of the precursors or details of the synthetic pathway; I had intended to look them up before posting but my botany supplies are in the office and I'm leaving for a trip tomorrow and wanted to get this up before heading off.

Tray Table Advertising

Flying back from Dallas to Las Vegas last week on America West we were surprised to find the following department store advertisements on the tray tables (I've blurred any identifying text):

tray table ad 1 tray table ad 2


So, apparently while I'm flying I want to look at either shoes or a pseudo-hunk lounging around. I actually first saw this style of ad on America West a few months ago when the tray tables in my row all had car ads on them, but I didn't have a camera with me to snap a picture.

Monday, June 07, 2004

Texas Woofus: mystery solved

On my recent trip to Dallas I visited Fair Park along with Semantic Compositions, our SOs, and another friend. We went to the park hoping to visit the gardens there, but upon arriving we found that the gardens were closed. My SO quickly discovered that the nearby aquarium was open, but Semantic Compositions and Mrs. SC nixed that idea (darn non-biologists not appreciating nature), so we looked for the nearest directory.

On that directory we found a list of "Special Interest Points":
special interest point list

Since none of us had any clue what a Texas Woofus was, this meant it had to be something cool and thus we set out to find it. First up was to find it on the map:
map with texas woofus labeled

Of course the Woofus was across the park from where we were, but we were sure the Woofus would be well work the trek. On the way to the Woofus we passed the Cotton Bowl stadium, what looked like an abandoned amusement park, and the portion of Fair Park every tourist longs to see: the State Fair of Texas Administrative Offices.

When we arrived at the location specified on the map all we found was a very plain-looking building labeled "swine".

swine building front swine building back


We figured that most Texans would know to call a swine building a swine building, so we kept looking. We found another map, confirmed we were in the right place, and then walked around the swine building again, but there was still no Woofus. We eventually gave up and headed off to the Texas Hall of State, and SC and I swore to discover later what a Woofus was.

This morning I'm proud to announce that I finally discovered what the Texas Woofus is: it's a statue that we walked past at least two times (so much for our scientific powers of observation). In fact it is barely visible on the left side of the picture above:

woofus statue

The Fair Park art and architecture fact sheet (link is a PDF) has more information:
"The Woofus, a combination of six classic Texas animals, sits outside the Swine Building atop a 16-foolt [sic] pedestal and was originally created for the 1936 Texas Centennial Exposition by sculptor Lawrence Tenney Stevens but disappeared shortly thereafter. It has a sheep's head, a stallion's neck, a hog's body, turkey feathers and duck wings. The "crowning" glory of the piece is a set of ten-foot wide Texas longhorns gilded with chromium with a crown perched between them and a Mexican blanket draped around his shoulders. The Woofus was returned home in September of 2003 thanks to the efforts of Friends of Fair Park and the State Fair of Texas."

The mystery of what a Texas Woofus is can now be laid to rest. Check this site in the future for more equally compelling pieces of detective work from Radagast, Semantic Compositions, and team!